![[Guide] Using Images in Your Widgets](https://yeloni.com/wp-content/uploads/2017/03/upload-images-02.png)
Here is an easy way to quickly upload images and use them in your widgets.
Using Images in Widgets
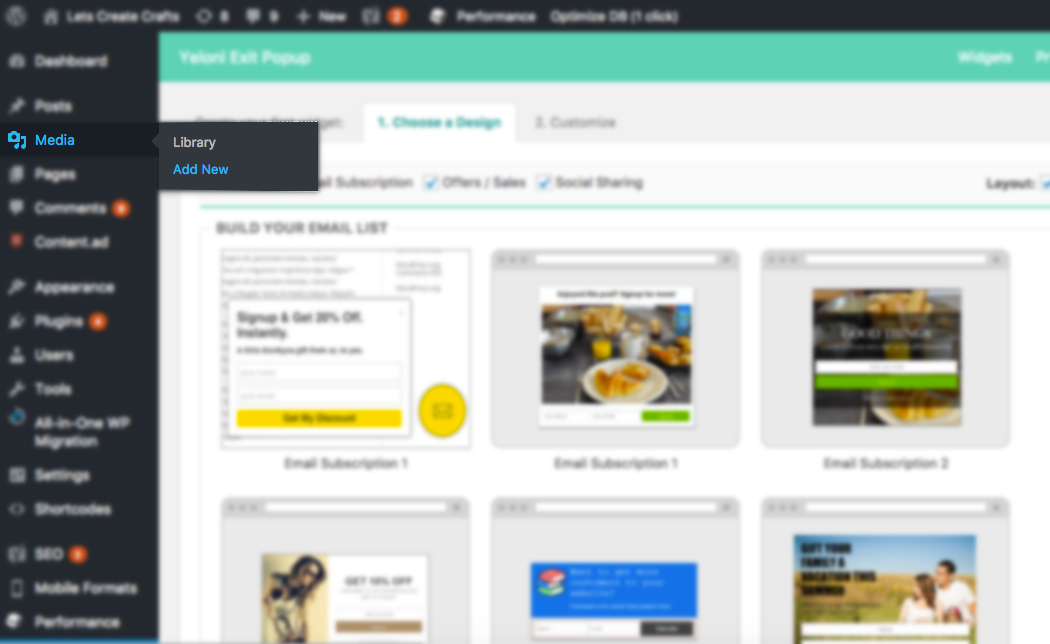
1. From your WordPress dashboard, go to Media -> Add New.
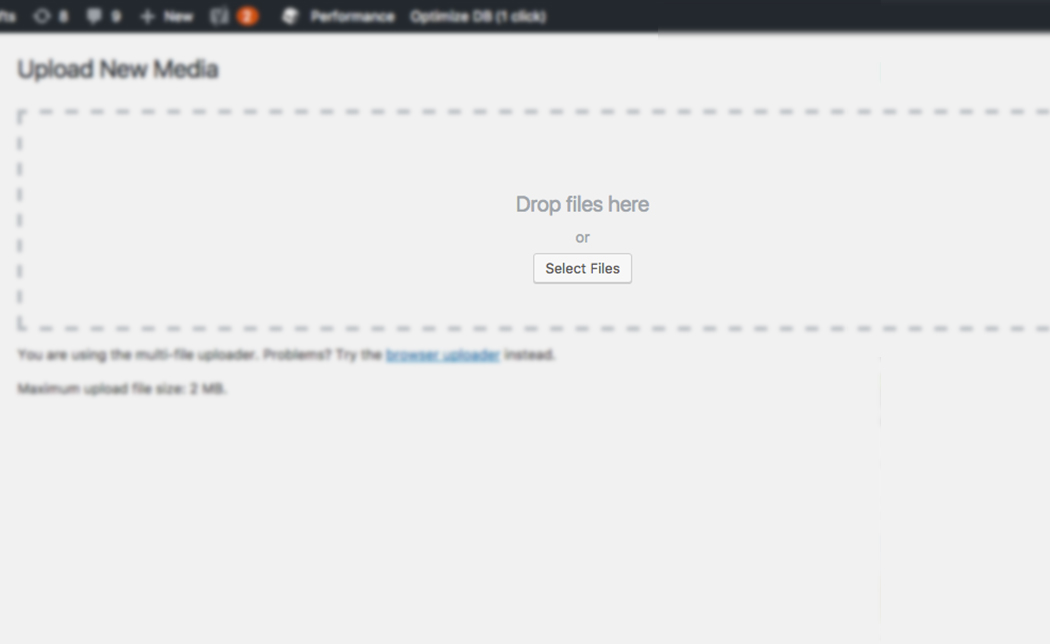
2. A screen similar to this appears. Click on Select Files or drag and drop your image into the dashed

3. Once the image is successfully uploaded, you can see a small white box at the bottom with the image name and an Edit link. Please click on Edit.

[4. This is the ‘Edit’ screen. The image is shown on left with its details on the right side.
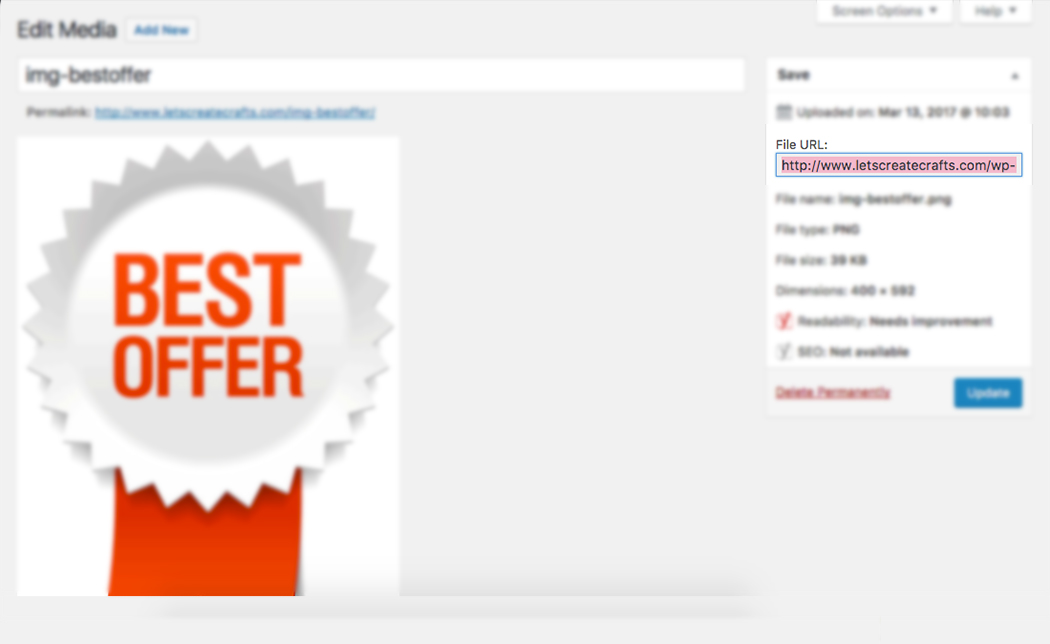
5. Select the text under File URL and copy it. Please ensure that the complete text is selected.

6. Once the File URL is copied, come back to creating a Yeloni widget and open the Image section.

7. Paste the File URL into the Enter Image URL section. If the URL has been correctly copied, the image is shown on the left.
After this step, continue with creating and saving the widget.
[Image courtesy: Google]